Like the tail-fins on a chevy or the doo-wops in a song, the trim around the doors and windows say a lot about the age and style of the home. My current DIY project, part of a grander scheme to restore my 1927-built house to something resembling an original style of the time, is to replace all the door and window casings.
Is it really necessary to do all 23 doors, and 21 windows? Well, if I do, then it will all match, which it doesn’t now. And be the appropriate era. And I can improve on areas where the current installation could be more skillful.1
After much consultation with purveyors of custom-cut casings, measuring, planning and calculating, I decide to make the window casings myself from stock lumber, rather than buy milled pieces. Because:
- It allowed me to do one room first to see if I liked it. (I did.)
- I buy a little at a time, which makes it easier to budget and store the raw materials.
- It’s more customizable. There isn’t much space between the top of the doors and the ceiling on my second floor, so creative solutions are called for. I can also decide as I go whether to install painted or stained trim. Stock casing often comes only in paint grade (can’t be stained), or stain grade (costs twice as much so you don’t want to paint it), or MDF (not in my house).
- I think its cheaper. $3.35 per lineal foot, compared to $5 to $6 for architectural header from stock. Of course, making it myself also requires glue, screws and labour. But it’s keeping me busy during our latest wave of the pandemic.
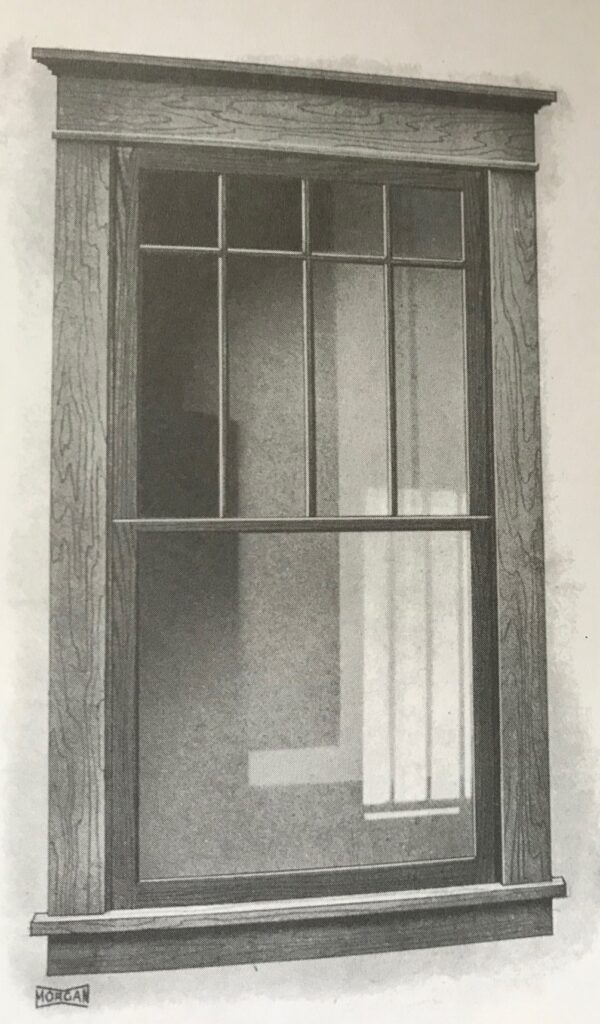
This is what I chose as a model, published in ‘Homes & Interiors of the 1920’s. A Restoration Design Guide.’ from Lee Valley Tools Ltd (1987). I have seen this very style in older homes as well (i.e. older than the 1920’s) so it appears to be a traditional style.

As I am discovering, each window and door in the house presents unique challenges. This is window I’m currently working on, which seems to have been one large window, replaced later with two smaller ones. Thus, the odd pillar in the centre. This may or may not be the explanation for it being bowed, but it is. The poor thing lost its sill somewhere along the way – the new one is in place in the photo. Touch ups of the drywall are called for.

Sample pieces of the lumber I use to create the window trim.

Pieces unassembled but cut to fit, from left to right:
- apron – fits under the sill – note that it tapers at each end to compensate for the bow in the wall
- two vertical bits
- sill with slot cut for central pillar
- header (more detail in photo below)

Header detail (will be installed the other way up)

Sill detail – constructed to mimic sills in the rest of the house, which I believe are original.
This window casing will be painted white, so I apply one coat of primer and two of paint next, sanding between each step.
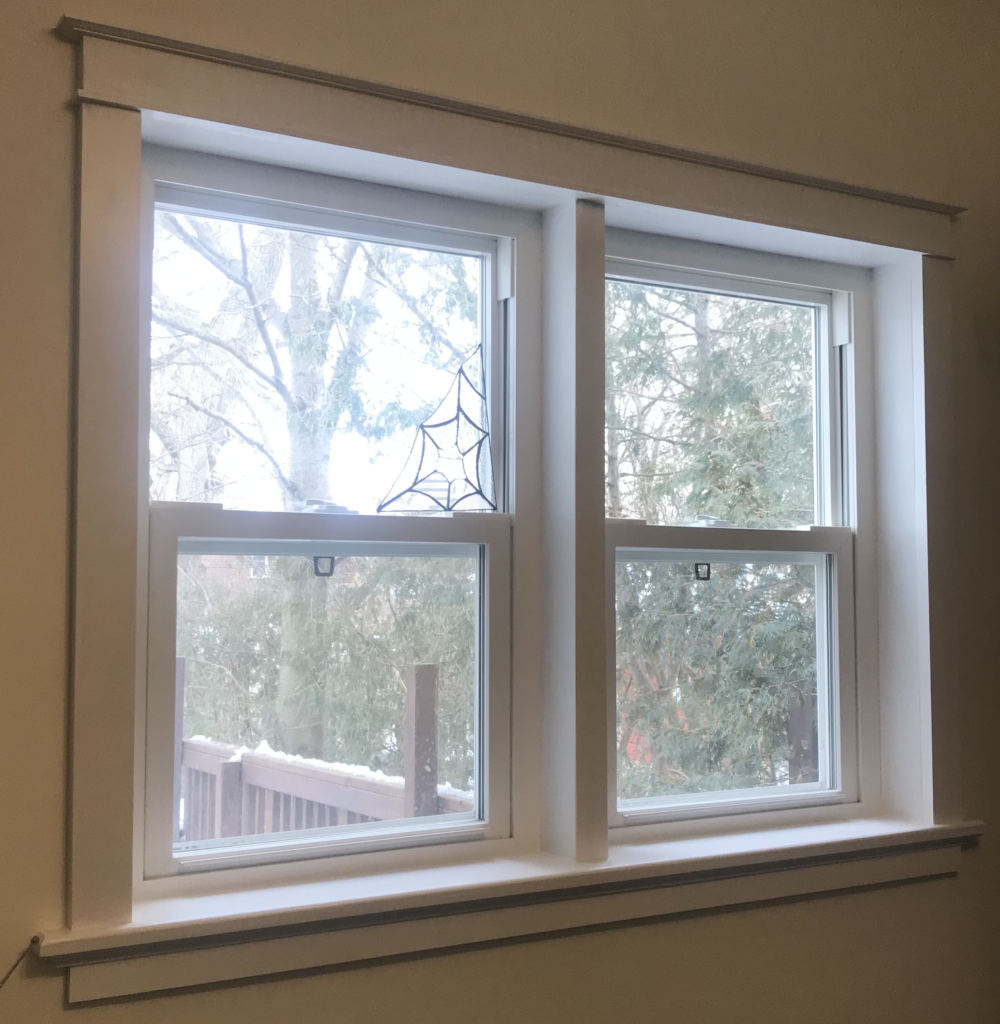
The finished product, after screwing in place, filling gaps due to misalignment of drywall and window frame2, or window frame and window frame3, tidying up with caulking4, hiding screw holes5, and adding another coat of paint.
I stand back for a moment, admire the solidity, the style, the completeness, but mostly that I did it myself. Then, the next unkempt window frame calls to me to restore it. 15 more to go!
———
1Is this enviro-positive ? What I remove is going in the waste. I am replacing it with natural materials, carbon-sequestering even. I give it earth-neutral at best. But social positive as an attempt to preserve history.
2MDF trim, with its flexibility and the groove on the backside would compensate for this, but I’m happy enough with the final look to do the extra work.
3Many things in this house are not level, even, or plumb.
4To give credit where it is due to innovation, ‘crown moulding caulking’ is a miracle in a tube. It neatly seals up gaps with no fuss and the result is indistinguishable from pro carpentry.
5Yes trim screws. Sure, nail gun with finishing pegs requires less plugging but the screws let me pull the trim into place. However, in the back of my mind, I know the next owner of this house will not thank me if they decide to do more renos. I’ll just have to hope they appreciate the uniformity and historic style I’m recreating.